
Tips & Tricks for Crocheting With a Family
"I already know how to crochet.", you might say. Throw in two kids, a dog, cat, and husband and by-golly Miss Molly you'll figure out a way to crochet throughout the day! Of course there are good days where you can literally crochet for hours on end in between everything, but for those like me who have an on demand breastfed baby, a toddler, a couple of critters and a "man-child" (he needs mommy too sometimes) these tips and tricks will save the day!
Step One - Shhh! I'm Counting!
Forget the counting! Yes, you heard it from me but I have no shame. There are thousands of times I can count where I've always been interrupted when trying to count a row or round. I've learned to keep scrap yarn on the side to mark each row with. Right before I finish the last stitch of the round, I will either take the tail end of the project or a scrap yarn in a contrasting color, draw it through the last two loops, and join or continue on with my stitches. It's like using the same concept of color changing.
This is also useful for those who hate catching the seam in their work! You can continue with the same stitches through the entire project without joining. When you've finished your project, simply do a decrease stitch in the last two stitches of the last round and then slip stitch into the next stitch. I've found it makes it harder to catch the seam and by using a stitch marker I can never go wrong. I just keep simply pulling up on the same color of yarn throughout the project and since it is not sewn in it glides through the yarn easier, marking previous rounds as I go.
Step Two - To Finish, or Not to Finish?
Be ready for when life and family call. Projects may sit for a while before you can finish them, and that's okay! There is always nap time to try to finish up a round/row or two. This goes for all projects as well, not just crochet of course. I've a list of ideas and projects to make and it grows every day, some I've made and some I know will have to wait.
Step Three - Measure!
If you're not one for math there are many wonderful sites out there that can convert sizes, measurements, and even help you convert crochet to knit and vise versa. I have developed a handy chart for those wonderful hat makers out there, and it is available for free at no charge. I just ask that you link back to my website, please, and that sharing/reposting is greatly appreciated as well!
On to measuring, you'll always want to remember your gauge. Keep a handy binder near-by or a sticky note placed in your hook case with your gauge for every yarn you use. This will make referring to your own gauge easier so you don't have to waste time making a swatch. I recommend gauging for everybody, not just beginners. Somewhere a pattern is off, everyone's gauges are different, etc. and by having it down you can easily go back to it any time.
Step Four - Backups
Make sure you have backups for everything! I occasionally will write a disc with the patterns I've saved for when a nuclear war on my computer happens, because we can never be truly sure. I've thought I had lost precious memories forever when my computer crashed long ago, but with determination I was able to retrieve all of my photos, docs, music etc. (how to do that is a different story, and doesn't work for everybody or every situation).
Point-being have copies of everything, including your hooks and even yarns. You can never be too careful, and you never know when your yarn could be outdated or out-of-stock.
Step Five - Have Fun!
Make sure you're having fun. The joy of creating something is the satisfaction of the journey (and of course your results). Make a circle of friends to craft with, host Pinterest Parties, teach your children to craft, etc. Make great memories that will last a lifetime!
So there you have it. Crafting tips that will (hopefully) make life simpler! Feel free to share my photos, posts, etc. and don't forget to like the Facebook page! If you have any great crafts you would like to share, or stories of crafting, feel free to post them below. Have a pleasant rest of your Sunday!
P.S.
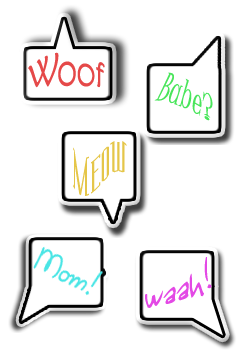
Don't forget the freebie Photoshop file of stickers at the end of the blog! It is saved in layers so each sticker is on its own background.
Forget the counting! Yes, you heard it from me but I have no shame. There are thousands of times I can count where I've always been interrupted when trying to count a row or round. I've learned to keep scrap yarn on the side to mark each row with. Right before I finish the last stitch of the round, I will either take the tail end of the project or a scrap yarn in a contrasting color, draw it through the last two loops, and join or continue on with my stitches. It's like using the same concept of color changing.
This is also useful for those who hate catching the seam in their work! You can continue with the same stitches through the entire project without joining. When you've finished your project, simply do a decrease stitch in the last two stitches of the last round and then slip stitch into the next stitch. I've found it makes it harder to catch the seam and by using a stitch marker I can never go wrong. I just keep simply pulling up on the same color of yarn throughout the project and since it is not sewn in it glides through the yarn easier, marking previous rounds as I go.
Step Two - To Finish, or Not to Finish?
Be ready for when life and family call. Projects may sit for a while before you can finish them, and that's okay! There is always nap time to try to finish up a round/row or two. This goes for all projects as well, not just crochet of course. I've a list of ideas and projects to make and it grows every day, some I've made and some I know will have to wait.
Step Three - Measure!
If you're not one for math there are many wonderful sites out there that can convert sizes, measurements, and even help you convert crochet to knit and vise versa. I have developed a handy chart for those wonderful hat makers out there, and it is available for free at no charge. I just ask that you link back to my website, please, and that sharing/reposting is greatly appreciated as well!
On to measuring, you'll always want to remember your gauge. Keep a handy binder near-by or a sticky note placed in your hook case with your gauge for every yarn you use. This will make referring to your own gauge easier so you don't have to waste time making a swatch. I recommend gauging for everybody, not just beginners. Somewhere a pattern is off, everyone's gauges are different, etc. and by having it down you can easily go back to it any time.
Step Four - Backups
Make sure you have backups for everything! I occasionally will write a disc with the patterns I've saved for when a nuclear war on my computer happens, because we can never be truly sure. I've thought I had lost precious memories forever when my computer crashed long ago, but with determination I was able to retrieve all of my photos, docs, music etc. (how to do that is a different story, and doesn't work for everybody or every situation).
Point-being have copies of everything, including your hooks and even yarns. You can never be too careful, and you never know when your yarn could be outdated or out-of-stock.
Step Five - Have Fun!
Make sure you're having fun. The joy of creating something is the satisfaction of the journey (and of course your results). Make a circle of friends to craft with, host Pinterest Parties, teach your children to craft, etc. Make great memories that will last a lifetime!
So there you have it. Crafting tips that will (hopefully) make life simpler! Feel free to share my photos, posts, etc. and don't forget to like the Facebook page! If you have any great crafts you would like to share, or stories of crafting, feel free to post them below. Have a pleasant rest of your Sunday!
P.S.
Don't forget the freebie Photoshop file of stickers at the end of the blog! It is saved in layers so each sticker is on its own background.

| stickers001.psd |


 RSS Feed
